
Zulip Freshdesk integration
See customer support interactions in Zulip with our Freshdesk integration!
Create Zulip bot for Freshdesk notifications
-
Create a bot for Freshdesk. Make sure that you select Incoming webhook as the Bot type.
-
Decide where to send Freshdesk notifications, and generate the integration URL.
Add notifications for new Freshdesk tickets
-
Go to your Freshdesk Admin page.
-
Under Helpdesk Productivity, select Dispatch'r, and then select New rule.
-
Set Rule Name to a name of your choice, such as
Zulip. -
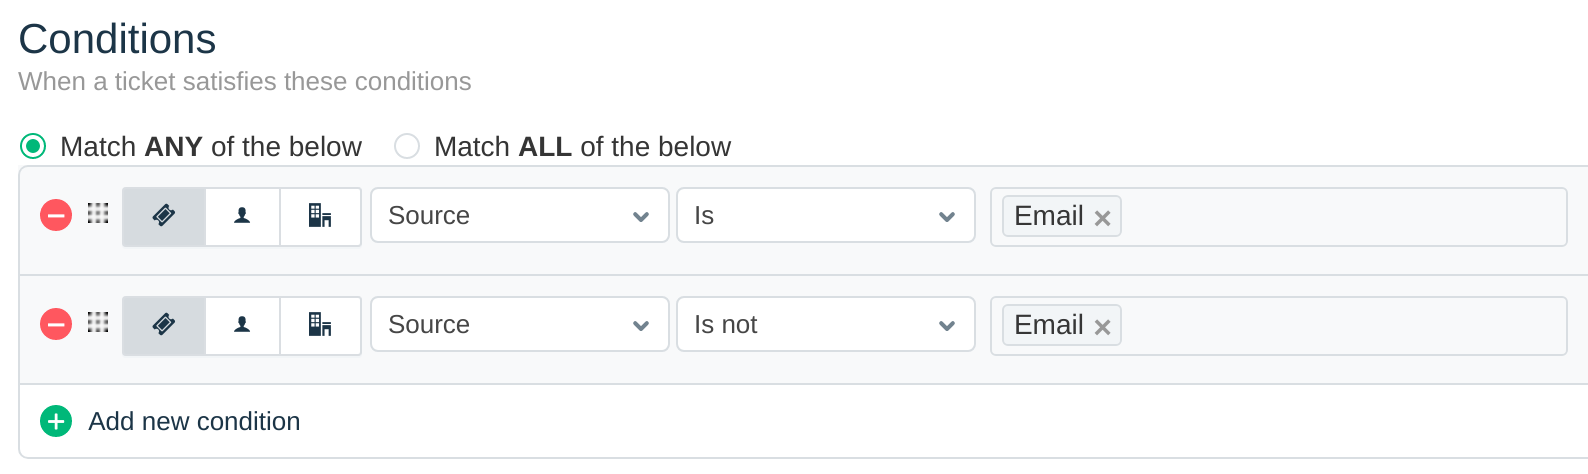
There isn't a shortcut to "always generate a notification on ticket creation", so we'll have to fake it by picking two complementary conditions: when the source is email, and when the source is not email. Set up the Conditions for the new rule, like so:
-
Under Actions, set the Select Action dropdown to Trigger Webhook.
-
Set Request Type to POST, and set Callback URL to the URL generated above.
-
Toggle the Requires Authentication checkbox.
-
Set Username to the email of the bot created above, and set Password to the bot's API key.
-
Set Encoding to JSON, and select the Advanced option. Copy and paste the following JSON into the Content box:
{"freshdesk_webhook": { "triggered_event":"{{triggered_event}}", "ticket_id":"{{ticket.id}}", "ticket_url":"{{ticket.url}}", "ticket_type":"{{ticket.ticket_type}}", "ticket_subject":"{{ticket.subject}}", "ticket_description":"{{ticket.description}}", "ticket_status":"{{ticket.status}}", "ticket_priority":"{{ticket.priority}}", "requester_name":"{{ticket.requester.name}}", "requester_email":"{{ticket.requester.email}}" } } -
Click Save.
Get notifications for changes to existing Freshdesk tickets
-
Go to your Freshdesk Admin page.
-
Under Helpdesk Productivity, select Observer, and then select New rule.
-
Set Rule Name to a name of your choice, such as
Zulip. -
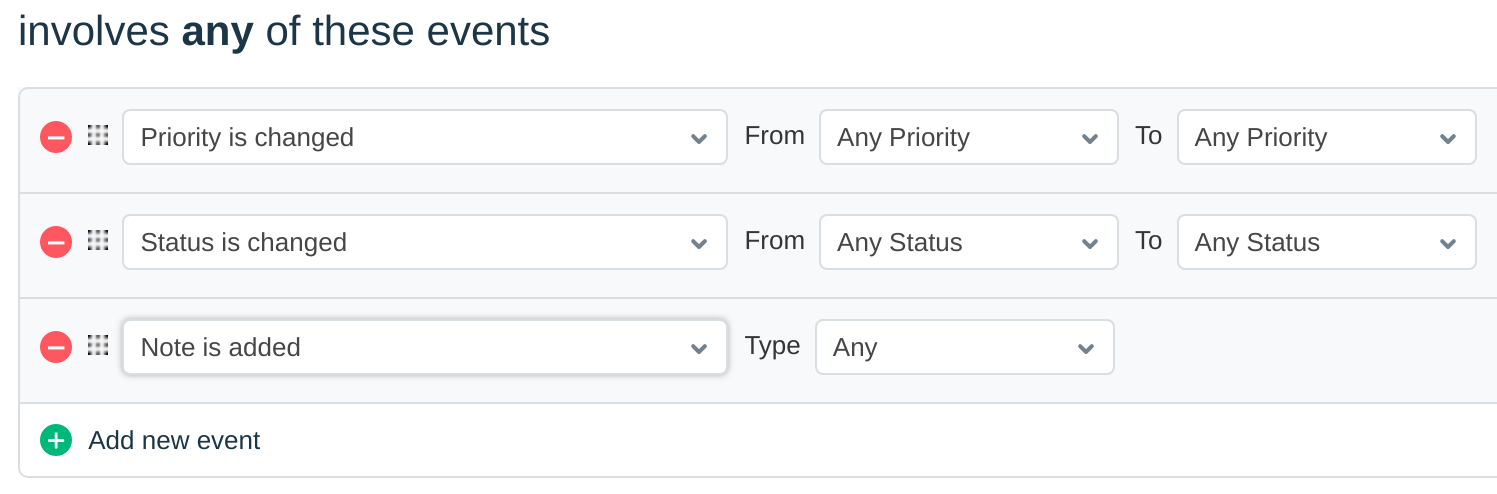
Under involves any of these events, create new events as shown below:
-
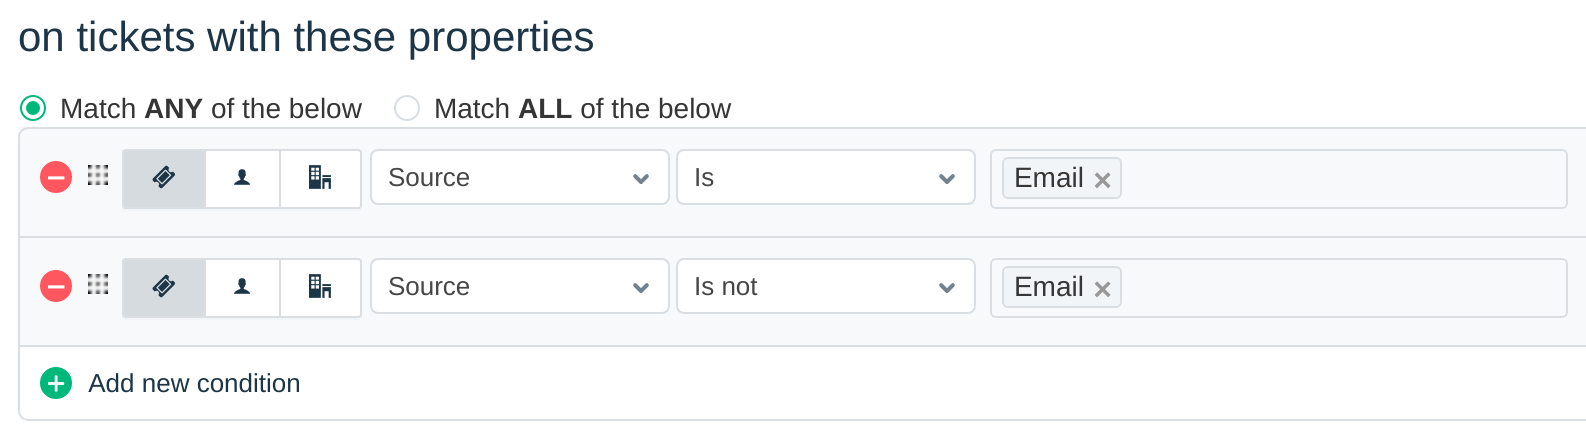
Unfortunately, there isn't a shortcut for specifying "all tickets", so we'll have to fake it by picking two complementary conditions: when the source is email, and when the source is not email. Under on tickets with these properties, create new conditions, like so:
-
Under perform these actions, set the Select Action dropdown to Trigger Webhook.
-
Set Request Type to POST, and set Callback URL to the URL generated above.
-
Toggle the Requires Authentication checkbox.
-
Set Username to the email of the bot created above, and set Password to the bot's API key.
-
Set Encoding to JSON and select the Advanced option. Copy and paste the following JSON into the Content box:
{"freshdesk_webhook": { "triggered_event":"{{triggered_event}}", "ticket_id":"{{ticket.id}}", "ticket_url":"{{ticket.url}}", "ticket_type":"{{ticket.ticket_type}}", "ticket_subject":"{{ticket.subject}}", "ticket_description":"{{ticket.description}}", "ticket_status":"{{ticket.status}}", "ticket_priority":"{{ticket.priority}}", "requester_name":"{{ticket.requester.name}}", "requester_email":"{{ticket.requester.email}}" } } -
Select Save.
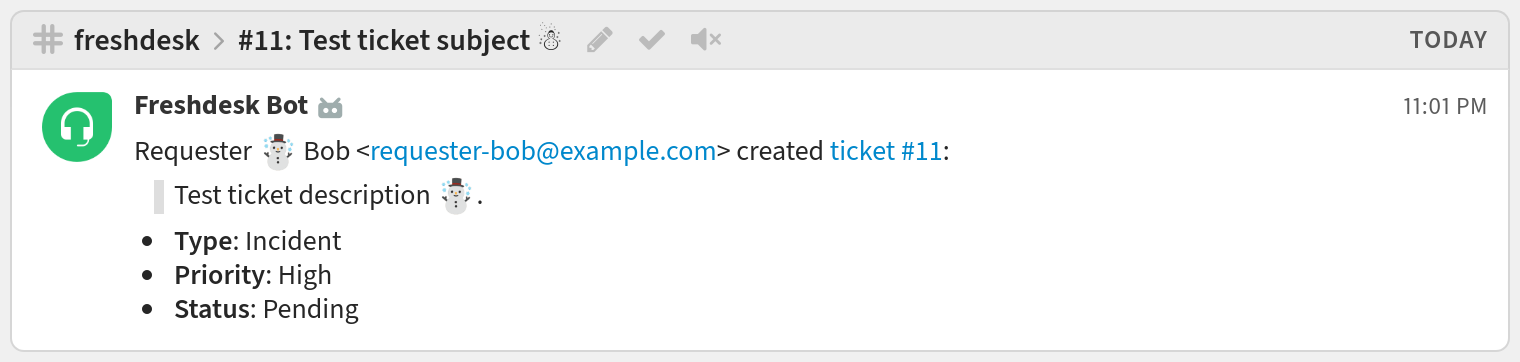
You're done! Your Freshdesk notifications may look like this:
Related documentation
Logos are trademarks of their respective owners. None of the integrations on this page are created by, affiliated with, or supported by the companies represented by the logos.