
This integration sends a notification every time a deployment is made in an OpenShift instance.
-
Create the channel you'd like to use for OpenShift notifications.
-
Download and install our Python bindings and example scripts on the system where the OpenShift integration script will be run from.
-
Then, create a new commit including all the changes made to the repository, and push it to your app.
-
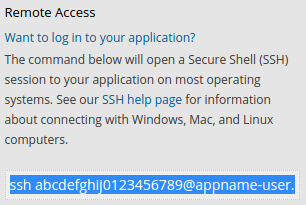
After that, connect to the application through SSH. If you don’t know how to do this, log in to your OpenShift Online account, go to your application’s dashboard, and click Want to log in to your application?. There you’ll find the app’s SSH user, address, and further information on SSH, in case you need it.
-
Open
/usr/local/share/zulip/integrations/openshift/zulip_openshift_config.pywith your favorite editor, and change the following lines to specify the email address and API key for your OpenShift bot:ZULIP_USER = "openshift-bot@chat.zulip.org" ZULIP_API_KEY = "0123456789abcdef0123456789abcdef" ZULIP_SITE = "https://chat.zulip.org" -
You can also specify which pushes will result in notifications and to what stream the notifications will be sent by modifying the
deployment_notice_destinationfunction inzulip_openshift_config.py. By default, deployments triggered by commits pushed to themain,master, andtest-post-receivebranches will result in a notification to streamdeployments. -
Save the file, and symlink
$OPENSHIFT_PYTHON_DIR/virtenv/share/zulip/integrations/openshift/post-receiveinto the~/app-root/repo/.openshift/action_hooksdirectory. -
Whenever you make a push to the
mainbranch of your application’s repository (or whichever branch you configured above), or if you force a deployment, the Zulip OpenShift plugin will send an automated notification.
You're done! Your OpenShift notifications may look like this:

Testing
You can test the plugin without changing your main branch by pushing to the test-post-receive branch.
Logos are trademarks of their respective owners. None of the integrations on this page are created by, affiliated with, or supported by the companies represented by the logos.